

- Tote bag
- Hoop
- Plastic pouch filled with 6 colors of embroidery floss, peel and stick pattern, and needle
- Stitching guide with color code and stitches used
What you'll also need:
- Scissors
- Bowl of warm water when you're finished stitching
- Towel
Setup
1. Peel off backing of pattern and stick onto tote bag. You can place the pattern wherever you want on the tote bag! The closer the pattern is placed to the opening of the bag, the easier it is to organize the bag while you're stitching.

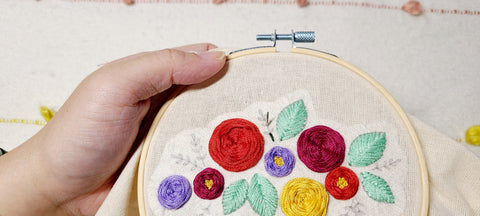
2. Attach the hoop with the pattern in the center. Make sure to tighten the screw to secure. Pull the fabric around the hoop so that the pattern is taut.


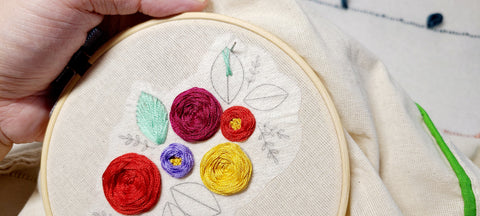
Woven Wheel Rose Stitch
1. Starting from the back of the fabric, bring the needle through the center of the flower.

2. Make a stitch to the end of the spoke. Repeat this for each of the 5 spokes.


3. Bring your needle up in the center and begin weaving the floss over and under the spokes. Alternate – going over, under, over, under each spoke.
Keep the thread slightly loose as you wrap it around the spokes.


4. Continue weaving the floss over and under until the spokes and outer circle are covered.

**Tip: If you're nearing the end of the floss, bring your needle down into the middle of the pie section and secure the floss by looping it around stitches on the back. Using new floss, go up from the back into the next pie section of the wheel and continue weaving.
Open Woven Wheel Rose Stitch
French Knot
1. Starting from the back of the fabric, bring your needle up through the "x".

2. With the end of the floss in one hand, wrap twice around the needle working from back to front.


3. Hold the end of the thread with your thumb, and with your other hand put the needle point back in right next to where you brought it up.

4. Pull the needle through the wrapped thread, holding lightly to the end until it’s all pulled through.

5. Repeat with the other 5 x's to create the center of the flower.

Woven Wheel Rose Stitch
1. Repeat the steps from the Woven Wheel Rose Stitch above, weaving the floss around the French Knot center.


Fishbone Leaf Stitch
1. Starting from the back of the fabric, bring the needle up from the middle of the leaf.

2. Stitch down at the end of the leaf.

3. Bring your next stitches adjacent to this stitch along the leaf border and cross over the middle line.


4. Repeat with each stitch, making sure to cross over the middle line.
**Tip: Turn the pattern so that the leaves are oriented the right-way-up for ease of stitching.

Lazy Daisy Branch
1. Starting from the back of the fabric, bring the needle up at the end of the branch and make back stitches to the end of the lazy daisy leaves. Repeat this 2x with the last stitch ending at the top leaf.


2. Bring the needle up at base of the leaf. Put the needle back in right next to where you came out. Without pulling the floss all the way through, bring the need up and out of the fabric at the top of the leaf.


3. Anchor the loop by bringing the thread back down just on the other side of the loop.

4. Repeat for each leaf on the branch.

Optional: You will have more than enough floss left over at the end of the pattern. With your newly learned embroidery skills, add more flowers and leaves for a more personal touch!
Preparing the bag
1. Remove the hoop once all your stitches have been completed.

2. Prepare the bowl of warm water. This will help dissolve the white border of the pattern.

3. Dunk the stitched pattern into the water. Gently rub off the pattern paper.

4. Once all of the pattern has dissolved, use a towel to pat dry. Insert the towel inside the bag and fold over to cover the embroidery.

6. Roll up and leave overnight to dry.


Optional: Iron set on low heat or use a steamer to remove wrinkles.
WOOHOO! YOU'VE FINISHED YOUR BAG! Don't forget to share and tag me @littleloveparcels so that I can see your lovely creation!
If you have questions or need some help, feel free to DM me on Instagram @littleloveparcels or send me an email at Stephanie@littleloveparcels.com ❤
